
how to format a usb drive on windows is usually simple, but doing it “correctly” on Windows 11 means picking the right file system, avoiding silent errors, and knowing when a full format is worth the time.
Most people format a flash drive because it won’t open, shows the wrong capacity, throws “write protected” messages, or they need it to work on a specific device like a Mac, a TV, or a car stereo. The catch is that one wrong choice (often exFAT vs NTFS) can create new problems you only notice later.
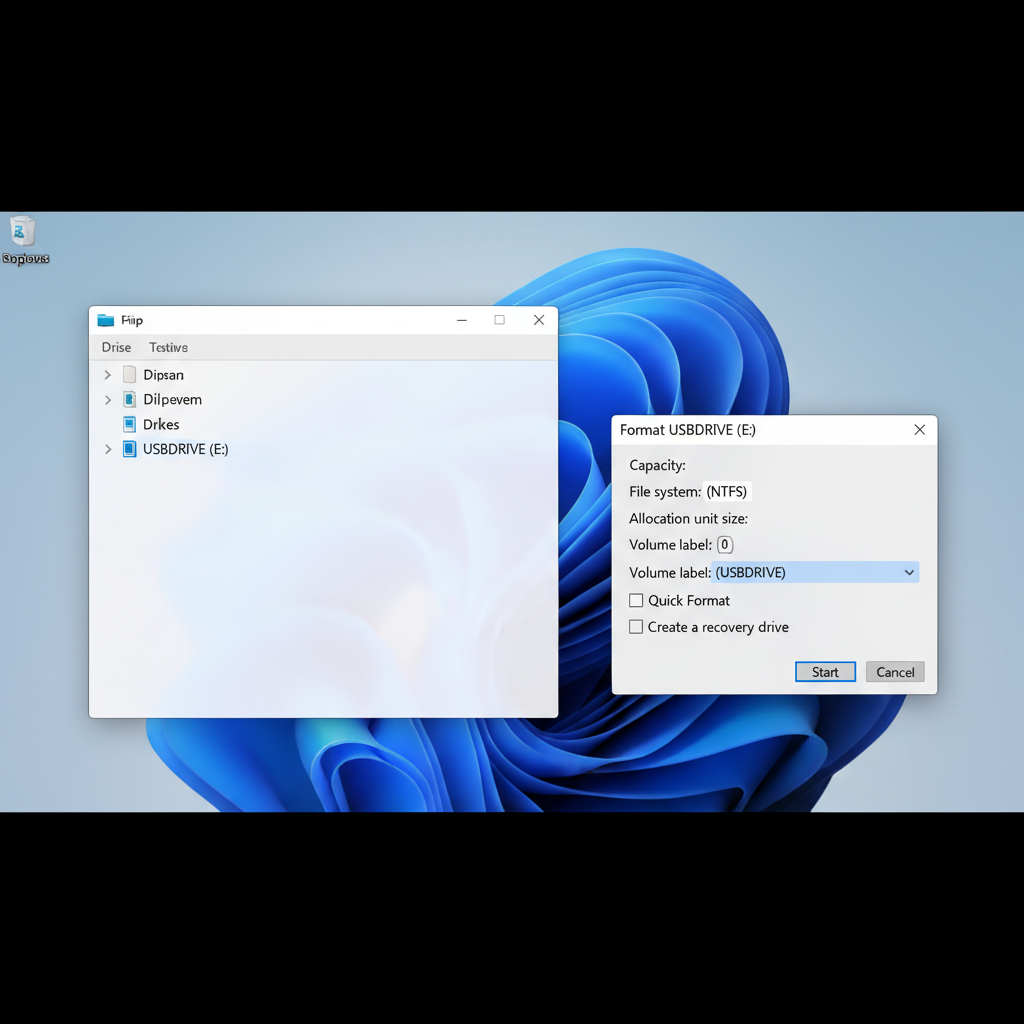
This guide walks you through the practical decisions: what gets erased, how to choose a format that matches your use case, and the exact steps in File Explorer, Disk Management, and DiskPart when things get stubborn.
Before you format: what formatting really does (and what it doesn’t)
Formatting rewrites the drive’s “map” so Windows and other devices know how to store and read files. In many cases, the data becomes inaccessible right away, even if some recovery tools might still find traces. If the files matter, back them up first, don’t negotiate with yourself on this one.
Key point: formatting is different from deleting files. Deleting removes entries; formatting rebuilds the structure.
- Quick Format rebuilds file system structures fast, but doesn’t scan the whole drive for bad sectors.
- Full Format takes longer and checks the drive surface for problems, which can be useful if you suspect physical issues.
According to Microsoft, a full format also scans for bad sectors, which is why it can take much longer on larger or slower USB drives.
Pick the right file system: NTFS vs exFAT vs FAT32
This is where most “it formatted fine but doesn’t work” stories start. Use the file system that matches the devices you actually plug into.
Quick decision table
| File system | Best for | Pros | Watch-outs |
|---|---|---|---|
| exFAT | Windows + macOS sharing, large files | Works across modern systems, supports files > 4GB | Some older devices (TVs, car stereos) may not read it |
| NTFS | Windows-only use, backups, permissions | Reliable on Windows, supports security features | macOS can read but may not write without extra tools |
| FAT32 | Maximum compatibility with older devices | Often recognized by legacy hardware | 4GB single-file limit, Windows may not offer FAT32 for large drives |
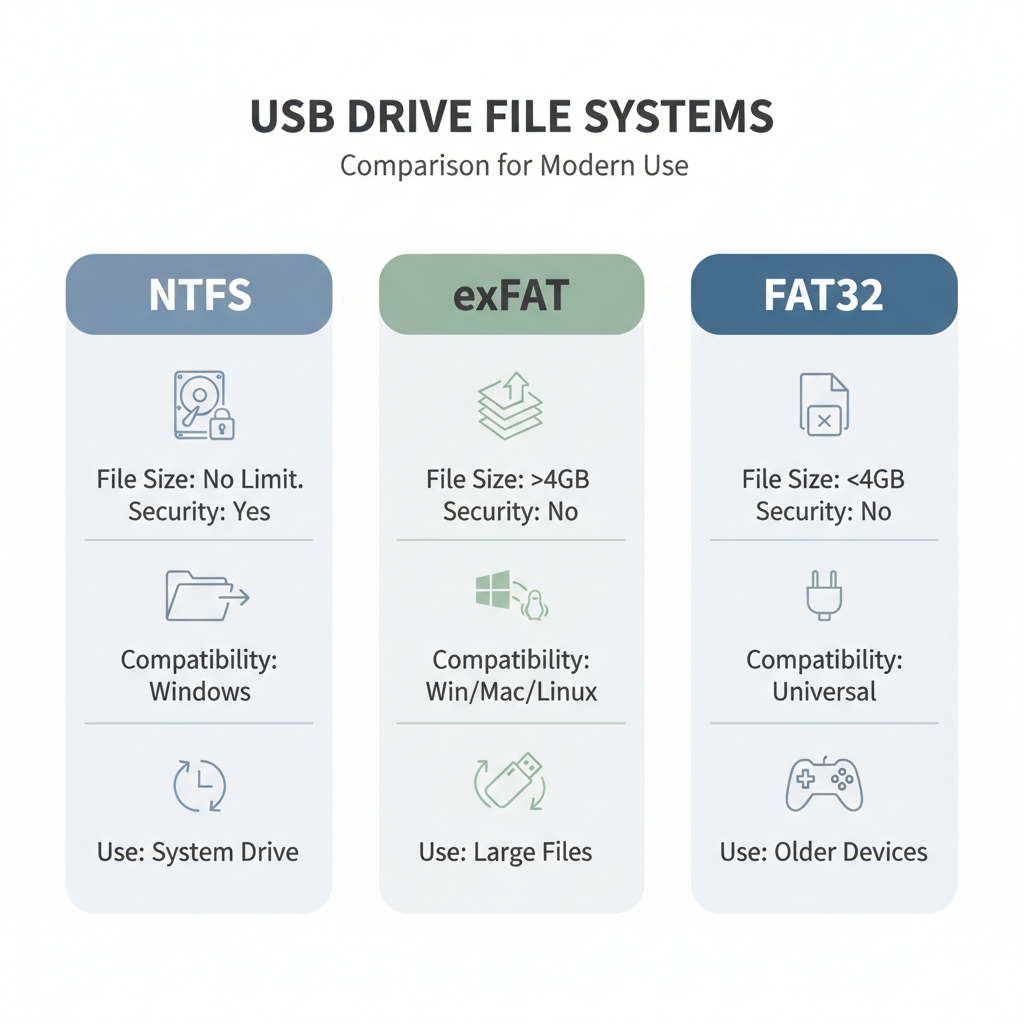
If you’re unsure, exFAT is a safe default for “move files between devices,” while NTFS is more “Windows-first.” FAT32 only makes sense when you specifically need compatibility with older gear.
Fast checklist: what you should choose based on your situation
- I need to copy movies larger than 4GB: choose exFAT or NTFS (avoid FAT32).
- I use this only on Windows 11 PCs: NTFS is usually fine.
- I share between Windows and Mac often: exFAT tends to be less annoying.
- I plug into a car/TV/printer: check the device manual; many prefer FAT32, some support exFAT.
- The drive has been acting flaky: consider a full format once, and keep an eye on errors afterward.
Also decide whether you need encryption. BitLocker works well with NTFS on Windows, but it can reduce portability to non-Windows devices.
Method 1 (most common): format a USB drive in File Explorer
This is the “normal” way and usually all you need when learning how to format a usb drive on windows with Windows 11.
Steps
- Plug in the USB drive.
- Open File Explorer → This PC.
- Right-click the USB drive → Format...
- Choose File system (NTFS, exFAT, or FAT32 when available).
- Set Allocation unit size to Default unless you have a specific reason.
- Name it under Volume label (optional, but helpful).
- Leave Quick Format checked for routine reformatting; uncheck it if you want a deeper scan.
- Click Start and confirm.
Small but important: if Windows shows the wrong drive letter or you have multiple USB devices connected, pause and double-check capacity before you hit Start. Formatting the wrong disk is a painful mistake.
Method 2: use Disk Management when Format is missing or errors out
If File Explorer won’t format the drive, Disk Management gives more control. This also helps when a USB shows as “RAW” or has weird partitions from an old Linux installer or boot tool.
Steps
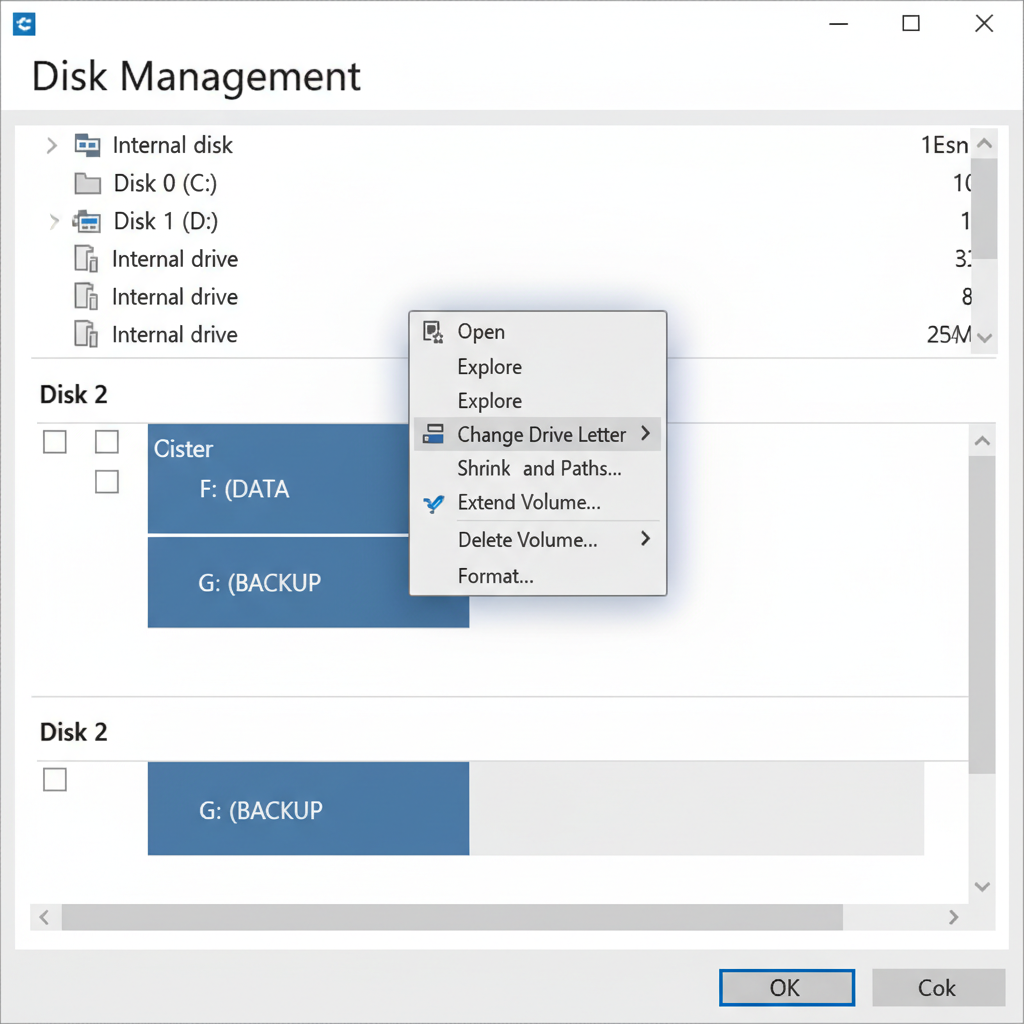
- Right-click Start → Disk Management.
- Find the USB drive by size (not just by label).
- If it has a partition: right-click the partition → Format...
- If it has unneeded partitions: right-click each → Delete Volume, then right-click unallocated space → New Simple Volume.
- Choose file system and finish the wizard.
Disk Management is also where you can fix a missing drive letter: right-click the volume → Change Drive Letter and Paths... and assign one.
Method 3 (advanced): DiskPart for “stubborn” USB drives
If the drive refuses to format, shows as write-protected, or has broken partition info, DiskPart can help. This is powerful, so go slow; selecting the wrong disk here can wipe the wrong drive.
DiskPart steps (careful)
- Open Windows Terminal (Admin) or Command Prompt (Admin).
- Type diskpart and press Enter.
- Type list disk to see all disks.
- Type select disk X (replace X with your USB disk number).
- Type clean (removes partition information).
- Type create partition primary.
- Type format fs=exfat quick (or format fs=ntfs quick).
- Type assign to give it a drive letter.
- Type exit.
If you specifically need FAT32 and Windows won’t offer it in the UI, DiskPart can format FAT32 on smaller drives, but Windows may still block FAT32 formatting on large volumes. In those cases, you either accept exFAT or consider a third-party tool, but choose carefully and avoid sketchy downloads.
Practical tips that prevent the most common formatting problems
- Use a direct USB port when possible. Hubs and front-panel ports can be flaky on some desktops.
- Don’t mix up “Quick Format” with “secure wipe.” Quick formatting is about speed, not permanent erasure.
- Keep allocation size on Default unless a specific device requires a certain cluster size.
- If a drive frequently corrupts files, it may be nearing failure. Formatting might “fix” it briefly, but reliability won’t magically return.
- Safely eject after big transfers. It reduces the chance of file system damage.
According to CISA, keeping software updated and using trusted devices reduces security risks; for removable media, a practical takeaway is to be cautious about unknown USB drives and scan when appropriate.
When you should stop and get extra help
If the USB contains the only copy of important files, don’t keep reformatting “to see if it comes back.” That often makes recovery harder. Many situations benefit from asking a data recovery professional, especially if the drive clicks, disconnects randomly, or reports 0 bytes.
Also, if a USB drive is managed by work policies, it may be locked down by BitLocker or group policies. In that case, your IT team usually has the cleanest path forward.
Conclusion: a correct Windows 11 format is mostly about picking the right target
If you want how to format a usb drive on windows to be a one-and-done task, focus less on the button clicks and more on the two decisions that actually matter: file system choice and quick vs full format. For most people, File Explorer with exFAT (for sharing) or NTFS (for Windows-only) is the sensible path, Disk Management fixes odd partitions, and DiskPart is there when the drive refuses to cooperate.
Your next step is simple: back up anything you care about, choose the file system that matches your devices, then format once and test the drive by copying a few files on and off before you trust it again.